Getting Started with Databricks
- 22 Jan 2025
- 3 Minutes to read
- DarkLight
Getting Started with Databricks
- Updated on 22 Jan 2025
- 3 Minutes to read
- DarkLight
Article summary
Did you find this summary helpful?
Thank you for your feedback!
Acante's Secure Data Access platform is specifically tailored to simplify security and governance for the Databricks platform. To integrate Acante with your Databricks implementation, Acante has provided a set of Notebooks to create all the necessary roles, configurations and gather the necessary meta-data. Databricks documentation: https://docs.databricks.com/en/index.html
Deployment Prerequisites
- Databricks CLI should be installed (v0.222.0 or higher) with profile created for workspaces being onboarded (documentation)
- Access to Databricks admin credentials
- External volume where Acante can create a meta-data catalog and volume
Sequence of Steps in Databricks
- Log in to the Acante UI, navigate to the Configurations --> Databricks section and Download the Notebooks
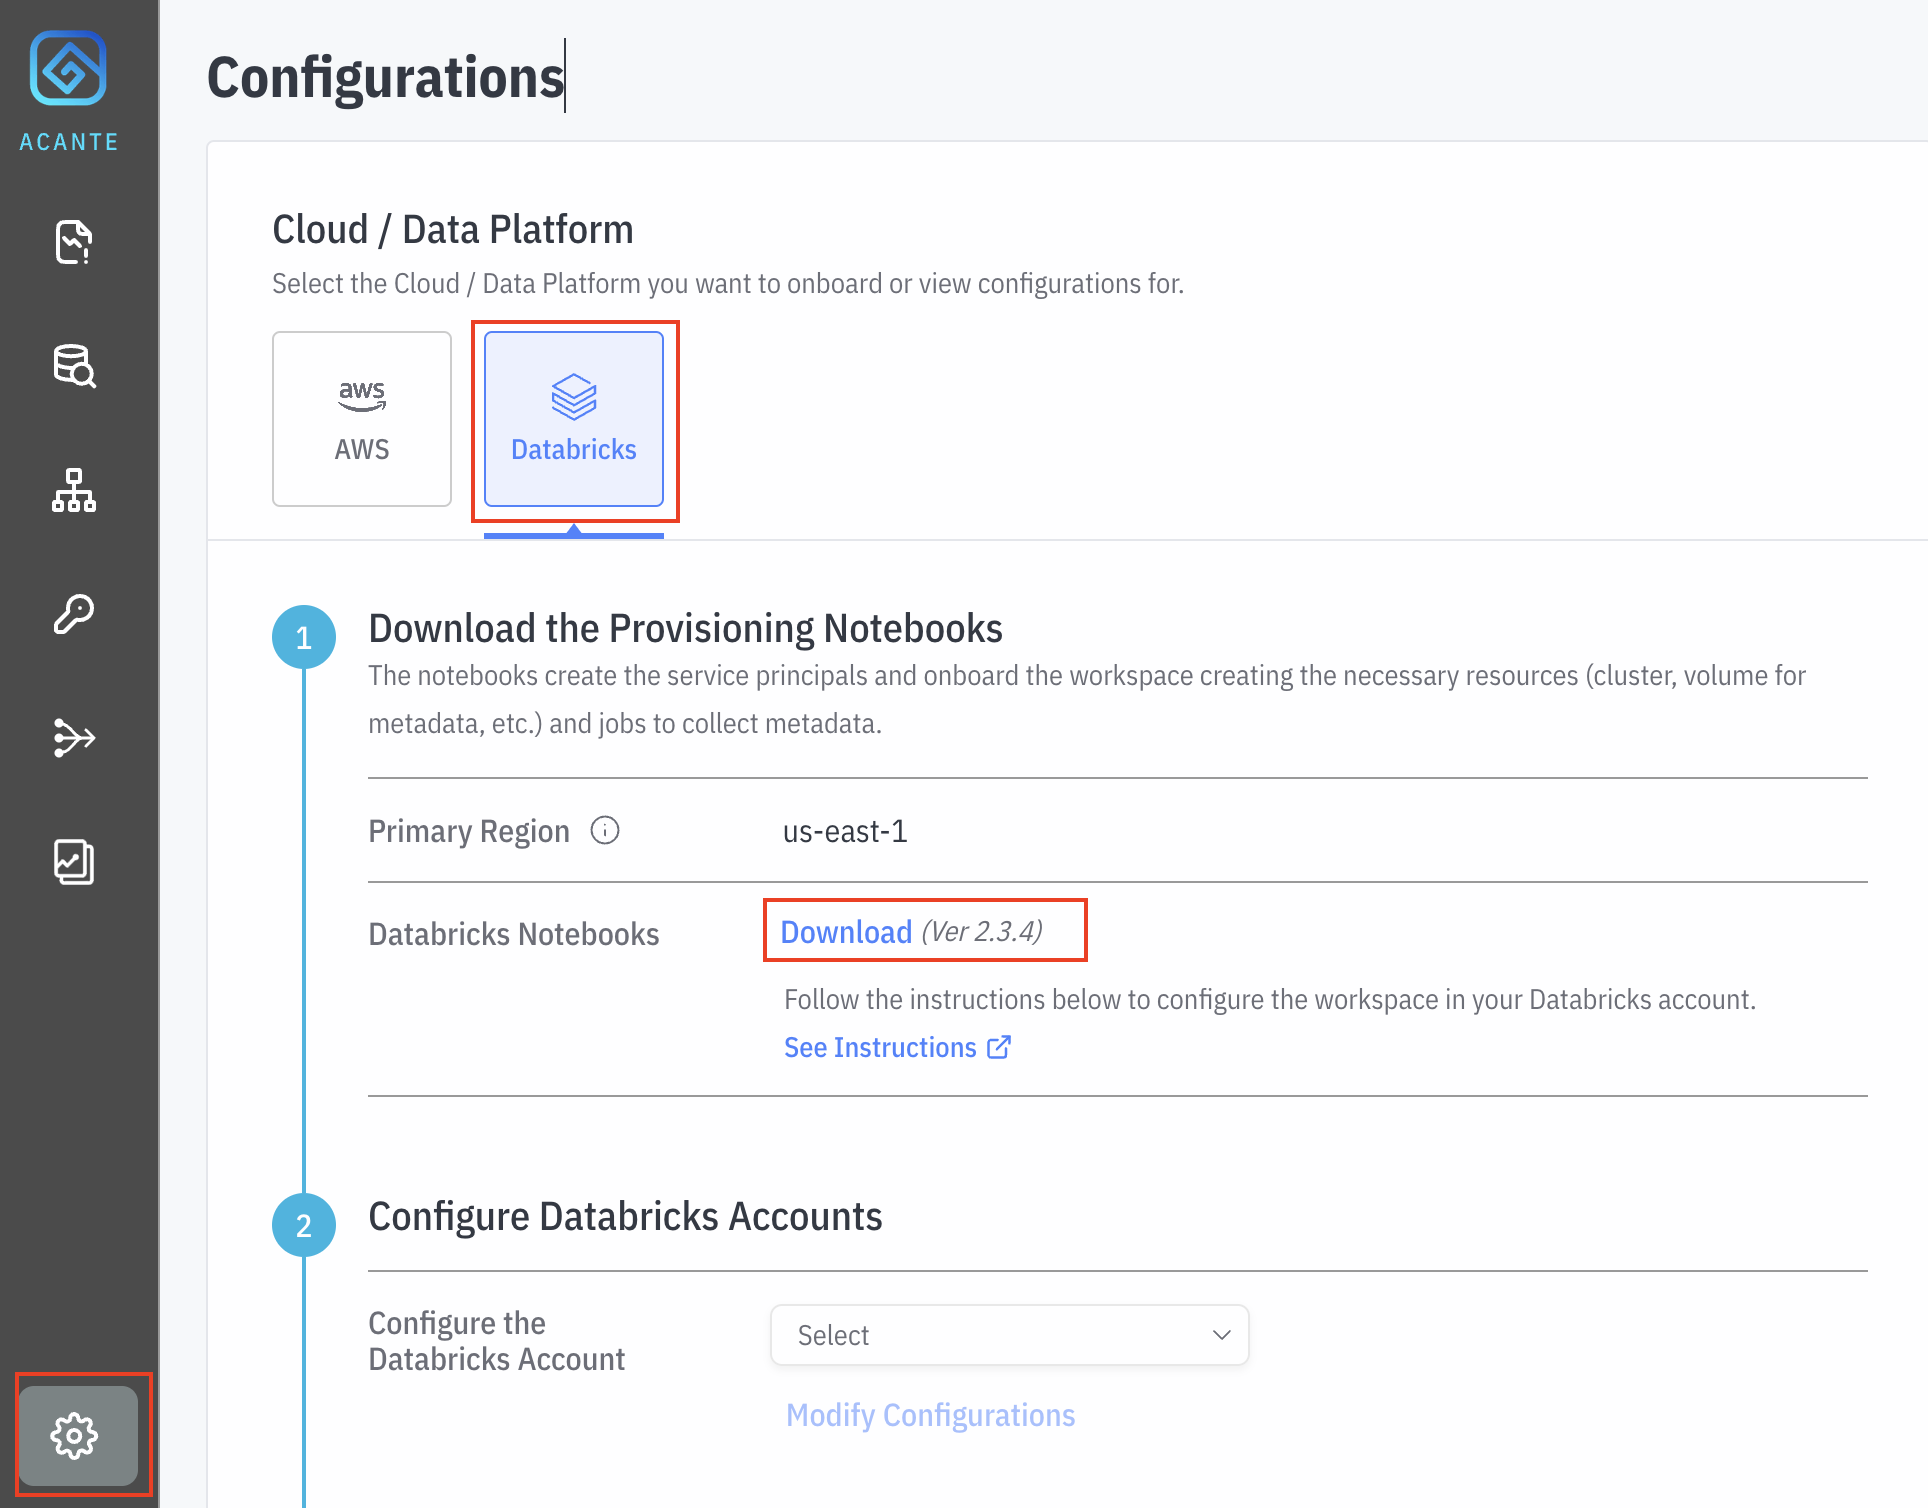

There are three notebooks in the folder:
- Acante Provisioning notebook: this notebook creates the service principals and onboards the workspace creating the necessary resources (cluster, volume for metadata, etc.) and jobs to collect metadata.
- Acante Metadata Discovery notebook: this notebook collects the necessary metadata (schemas, users, configurations, and so on). It does NOT read any of the actual data in your Databricks.
- Acante Input Variables notebook: this notebook has the inputs for Acante Provisioning notebook
- Log in to the primary Databricks workspace you are onboarding as Account Admin
- Import the three notebooks:

Browse and multi-select the downloaded notebooks & click Import

Open the Acante Input Variables notebook
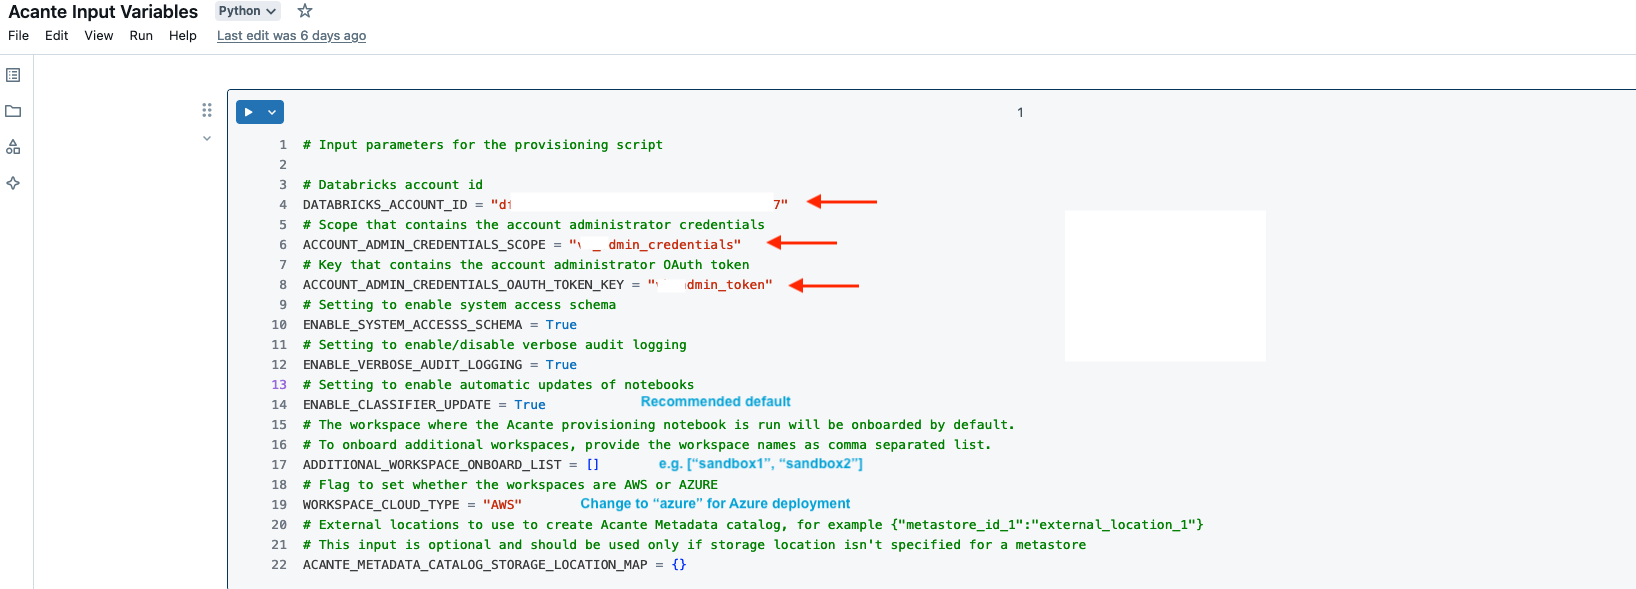
- Add the Databricks Account ID as described in the Databricks documentation
- Add Scope & Key for a Databricks secret in the current workspace with the Account Administrator (should be the current user) credentials. The recommended option is to use OAuth tokens (instead of the legacy Password option). Instructions to create the token & secret are as follows:
- [FOR AWS]
databricks auth login --host https://accounts.cloud.databricks.com --account-id <DATABRICKS_ACCOUNT_ID> - [FOR AZURE]
databricks auth login --host https://accounts.azuredatabricks.net --account-id <DATABRICKS_ACCOUNT_ID> - Using databricks CLI version v0.222.0 or higher, run :
databricks auth token --profile ACCOUNT-<DATABRICKS_ACCOUNT_ID> - Take output from the step above and create a Databricks Scope + Secret (note: the "--profile
" below is required if the default databricks cli profile does not point to the primary workspace being onboarded) databricks secrets --profile <profile-name> create-scope acante_scopedatabricks secrets --profile <profile-name> put-secret acante_scope acante_admin_token --string-value <secret>
- Note: By default, the generated token in expires after 1 hour, so the token has to be updated each time this provisioning script is run
- [FOR AWS]
- Enable Audit Logging: This flags turns on the ACCESS schema in Unity Catalog and enables verbose audit logs on all onboarded workspaces to read audit logs. Provides the necessary historical observability for Acante to analyze data access patterns.
- If you want to onboard additional Workspaces, enter the names as a comma separated list
Open the Acante Provisioning notebook
Run all to run this notebook. This will automatically setup all resources and permissions.


- Note the output of this cell "Workspace Onboarding Parameters. The json output will be used as a configuration in Acante.
- ONLY for Private Link: if you have restricted network access to the Databricks Control Plane via Private Link, then follow the steps here to provide access to Acante.
Providing the Configuration Inputs in the Acante UI
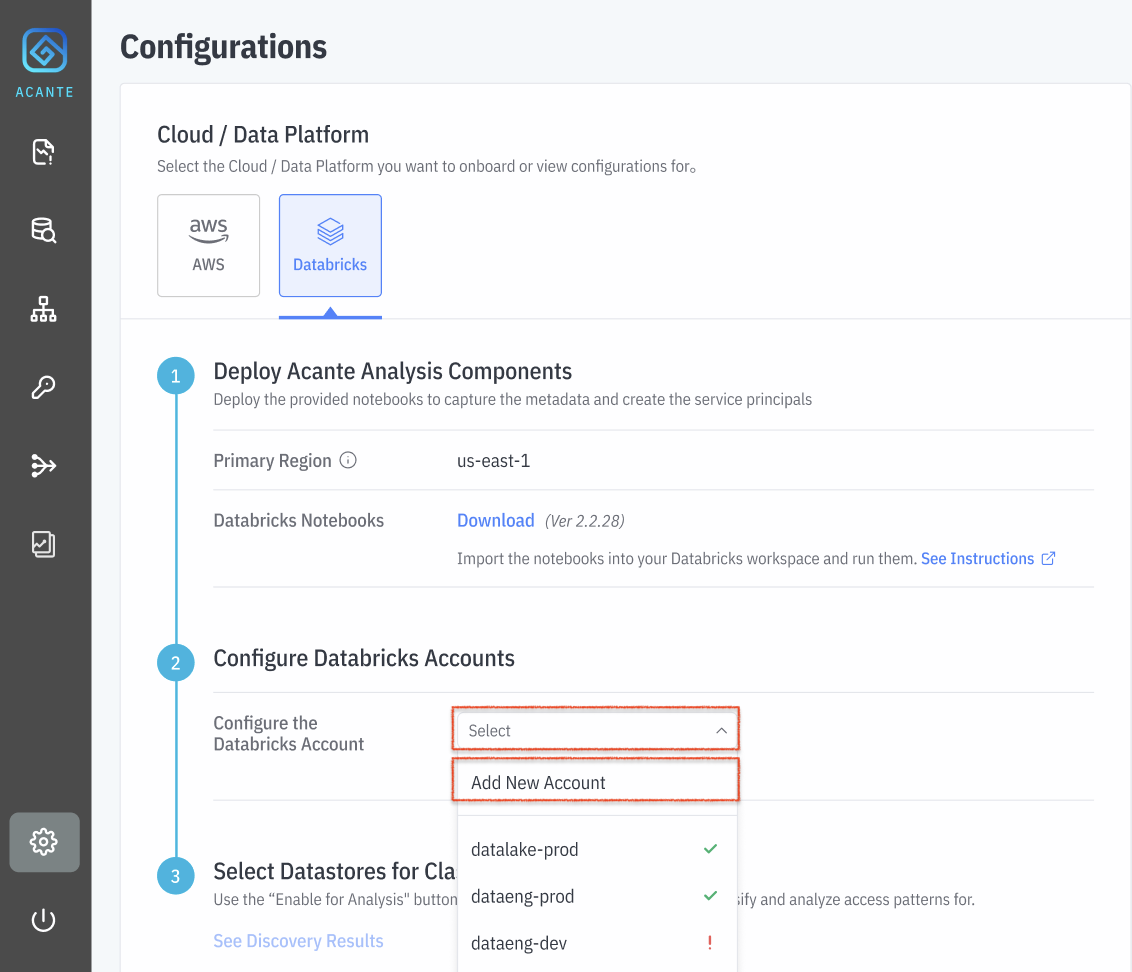
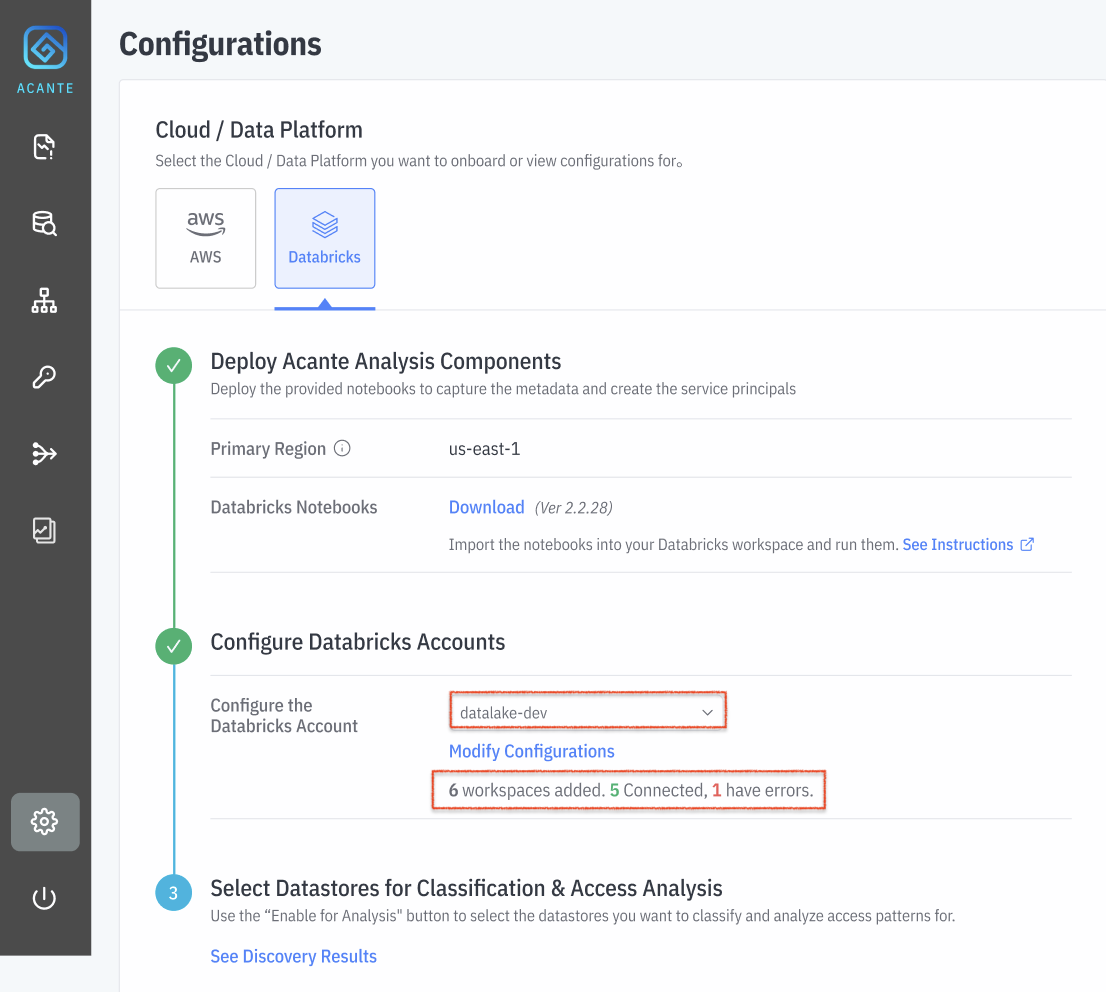
- Log in to the Acante UI and navigate to the Configurations page.

Click on Select Account and Add New Account . Alternately, you can also modify configurations for a previously configured account
Find and enter the configurations from your Databricks console into the input box
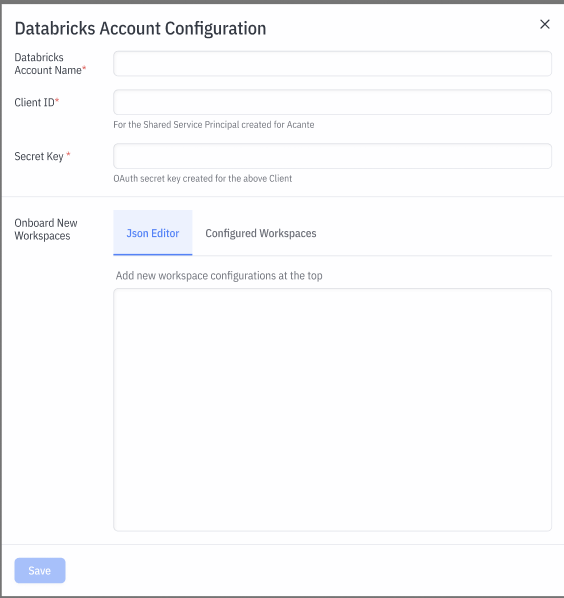
Add the Databricks Account Name from your Databricks console


- Next, add information for the Shared Acante Service Principal. In your Databricks console, go to User Management > Service Principals and click on the acante-principal-shared
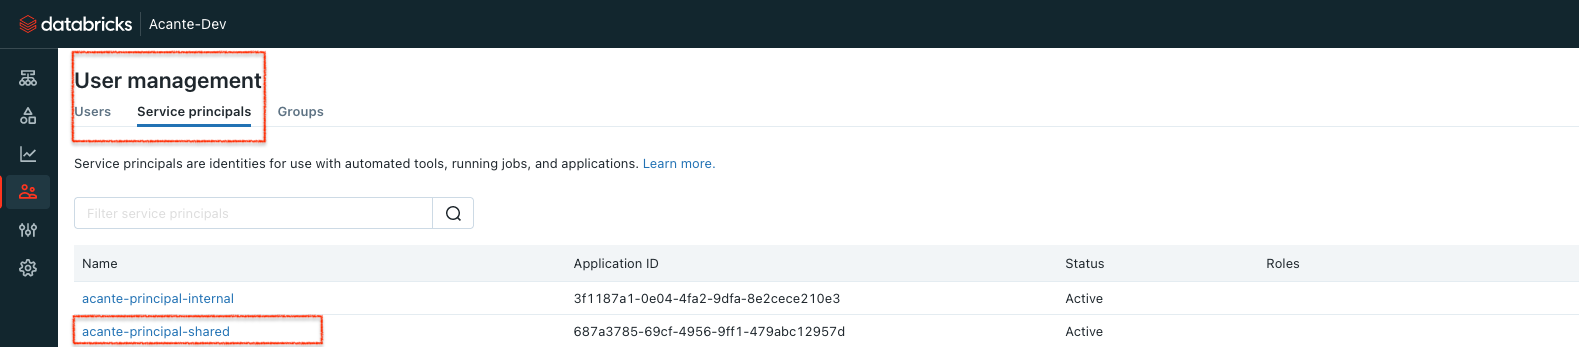

Click on Generate Secret to get the required configuration inputs:

- Client ID: this is ID for Shared Service Principal that the Acante Cloud can assume to pull the collected metadata
- Secret Key: OAuth secret created
- Collect the Workspace Onboarding Parameters which is JSON output from Cell 6 . Copy paste the entire JSON at the top of the JSON editor box in the Configuration box.

Press Save
Acante will check the connection for each of the workspaces and confirm that it could connect to each of them or if any of them had connection errors.
The Acante Cloud immediately triggers a Metadata Discovery process to pull all the Catalogs and their schemas. You can start seeing the analysis results in the product tabs shortly.
If the backend S3 buckets for Databricks are encrypted using Customer Managed Keys, please follow the step here
