Okta
- 11 Apr 2024
- 3 Minutes to read
- DarkLight
Okta
- Updated on 11 Apr 2024
- 3 Minutes to read
- DarkLight
Article summary
Did you find this summary helpful?
Thank you for your feedback!
Acante allows you to enrich the Access analysis with integration into Okta to bring complete Identity context into Acante. The integration is done using OAuth. By integrating Okta with Acante, the Privilege Analysis, Access Maps and all derivative solutions such as Entitlement Reviews, User Anomaly Detection, User Risk Analysis and so on are enriched in Acante with context from Okta.
At the end of this integration you will enable the Acante Cloud to connect with your Okta instance and make API requests. Okta references:
- https://developer.okta.com/docs/guides/implement-oauth-for-okta-serviceapp/main/#generate-the-jwk-using-the-admin-console
- https://developer.okta.com/docs/guides/implement-oauth-for-okta-serviceapp/main/
Sequence of Steps in Okta
There are several ways to configure Okta to protect the admin API. The simplest and most secure approach is to use a Service Application which combines a Client ID with a Private Key which the user provides Acante through the Acante Web application. The steps are below
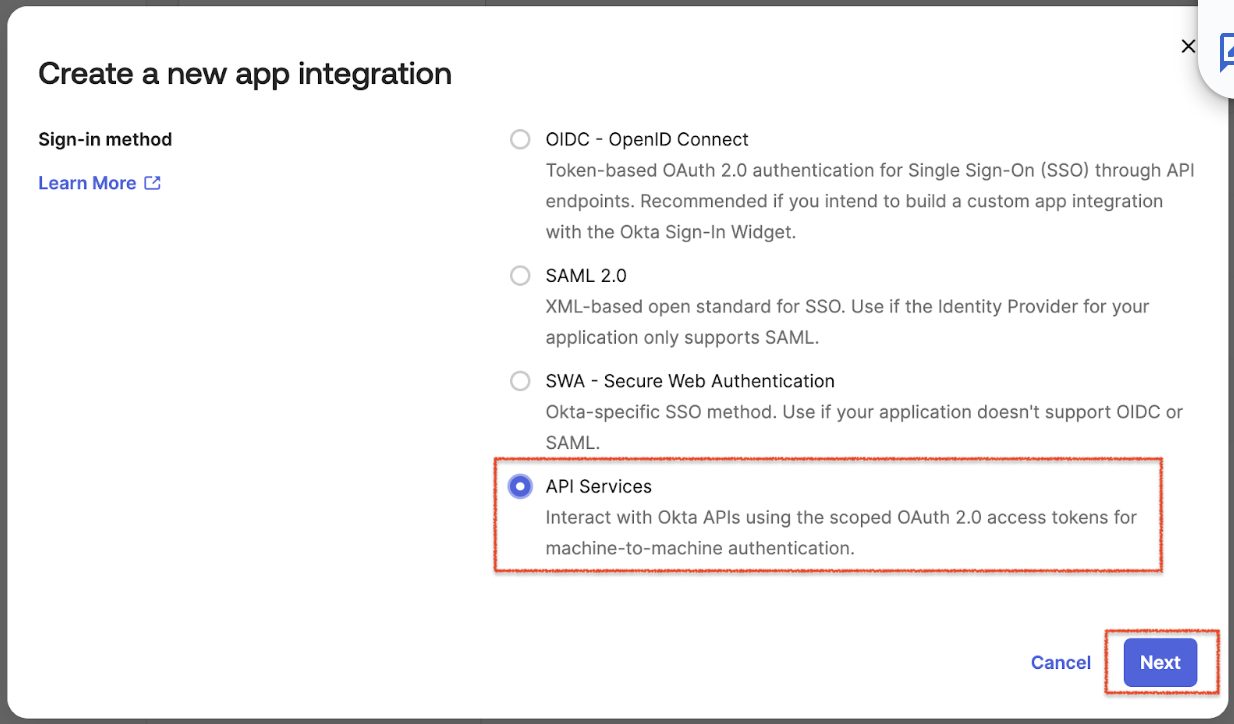
- From the Okta Admin console, click on Applications then Applications to get to the Application management tab.

Click on the Create App Integration button to create a new Application Integration.

In the Box, select the last bullet for API Services and click Next.
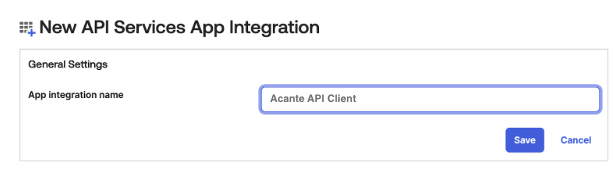
Provide the App integration name. Use “Acante API Client” or another name of your preference and click Save
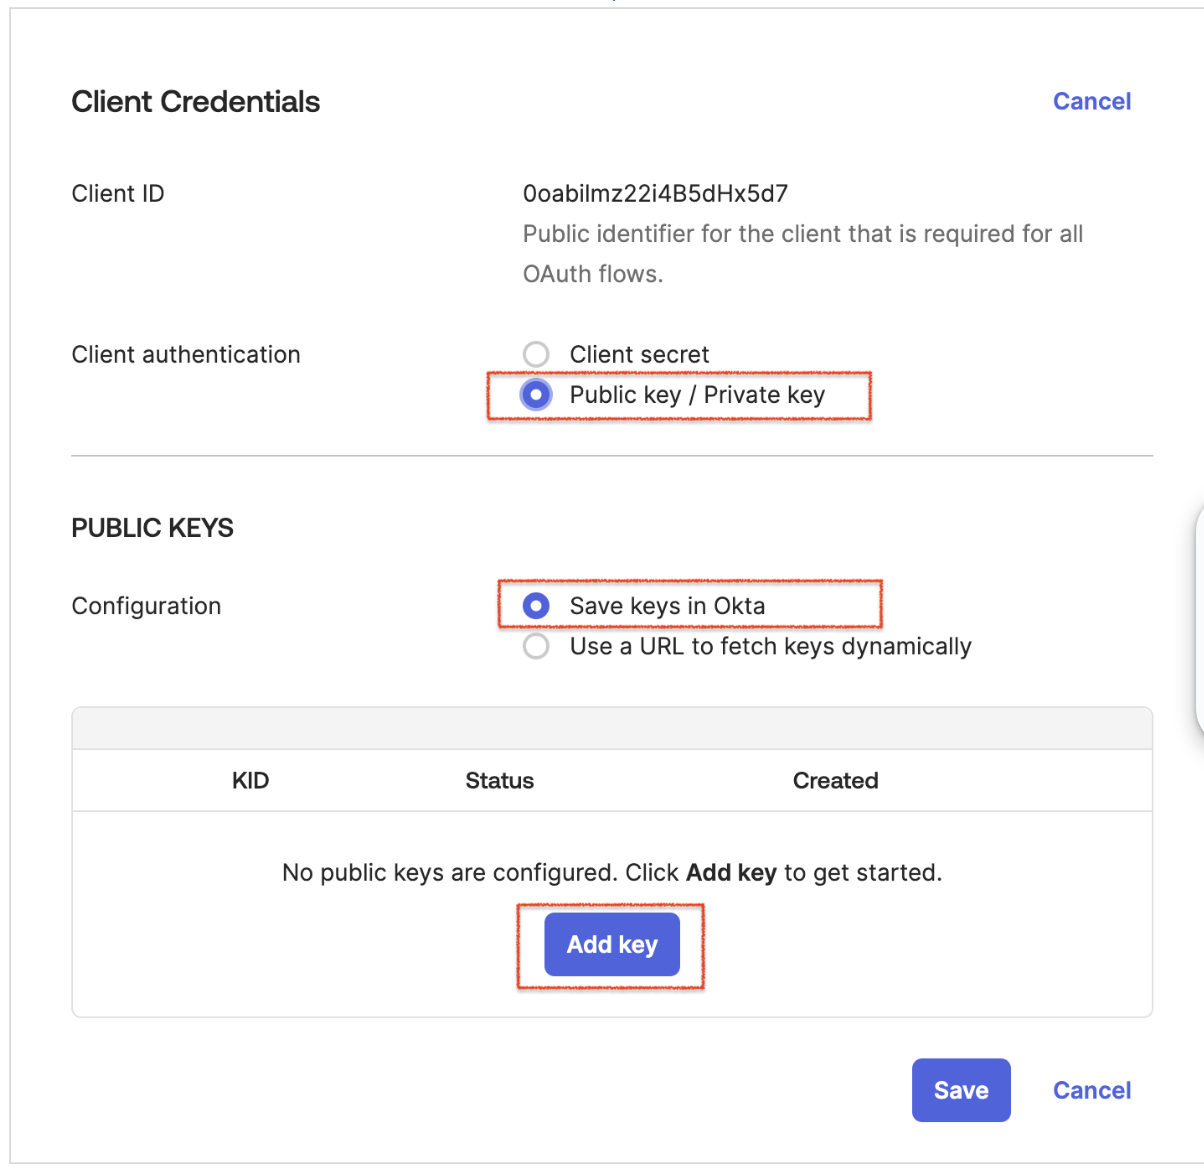
This will generate a new Client ID. Click Edit in the Client Credentials section
Under Client authentication, change the selection to use Public Key/ Private Key. Retain the default option to Save keys in Okta and click Add key button to add a new public and private key.
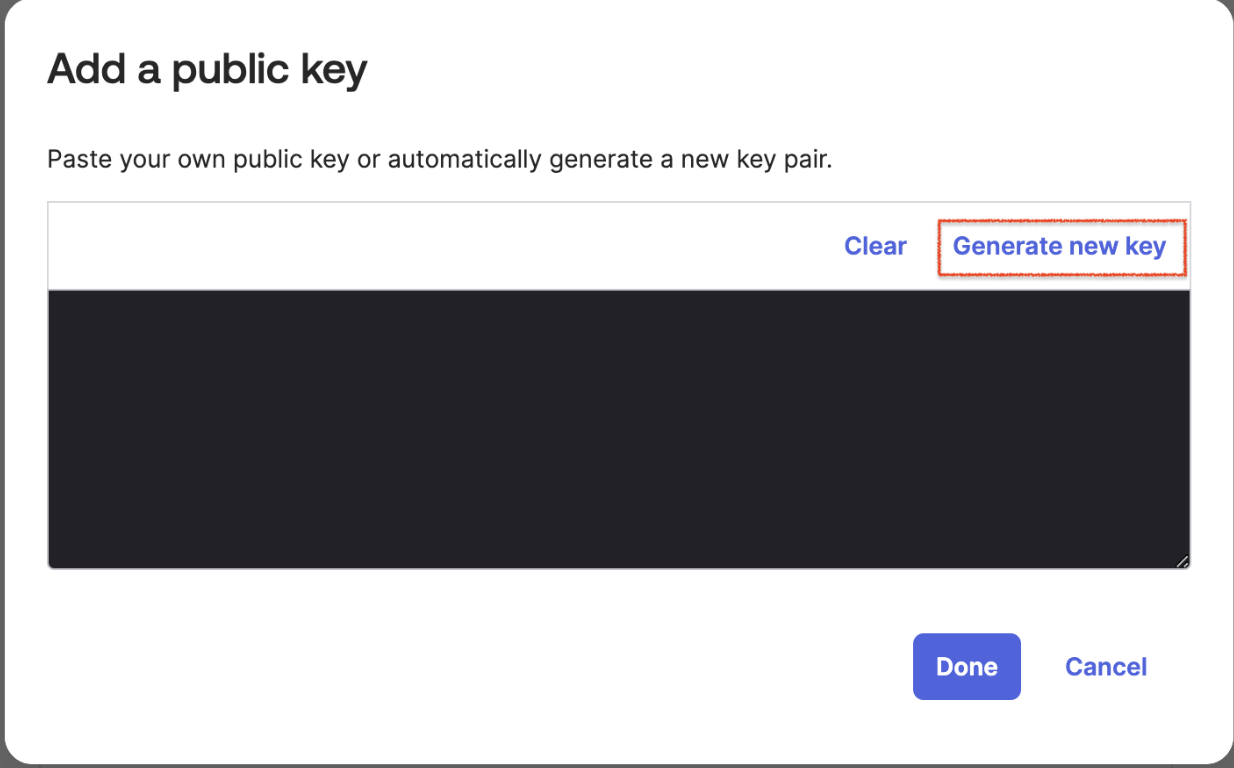
In the box for “Add a public key”, click on Generate new key instead of pasting an existing key.
A new public and private key will be created. The public key will be saved into Okta but you need to copy the contents of the "Private key" to a file on your computer.


Copy the contents of the JSON key to a file named okta_acante_api_key.json. This file can be converted to a PEM later if needed.
Click on PEM to get the PEM-encoded version of the private key and Copy to Clipboard . Along with the "Client ID" you will provide the text of this "PEM key" in the Configurations page of the Acante UI.
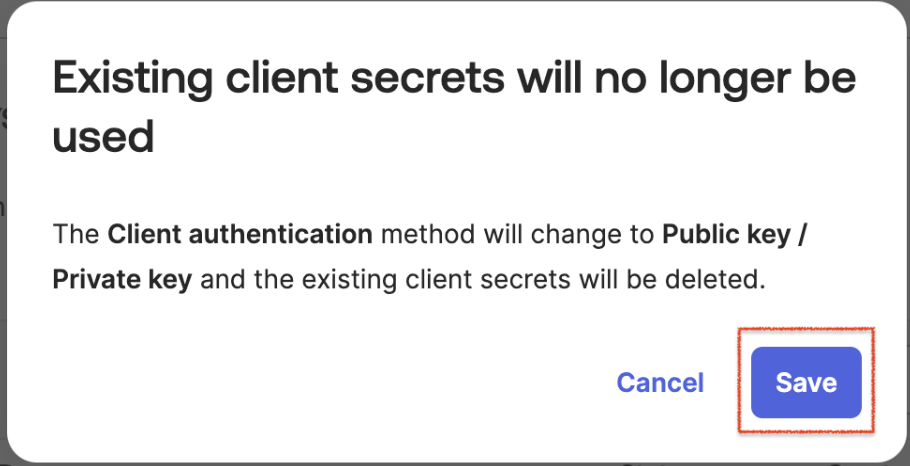
- Click the Done and then Save buttons to activate the new public and private keys. The Key ID (KID) will need to be provided to

Okta will show a warning that the existing client secrets will no longer be used and that they will be deleted. This is alright. Click “Save”.
Now that the key is created, assign scopes to the application in order to have the necessary permission to allow Acante to read Users, Groups, Applications, and other meta-data. Click on the Okta API Scopes tab.

Find the following scopes in the list and click “Grant”:
Okta.apps.read
Okta.groups.read
Okta.logs.read
Okta.users.read

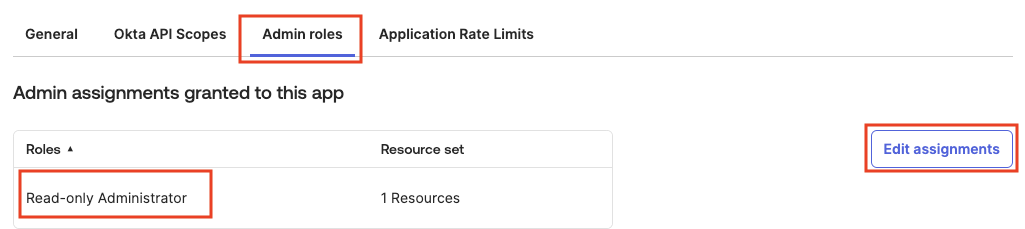
Okta also requires the Client to assigned a Role for selected Scopes to take effect. Click on the Admin Roles tab. --> Click on Edit Assignments --> Click on Add Assignment
From the Role dropdown menu select Read-only Administrator . Save the changes.
Ensure that the DPoP configuration is disabled


- That’s it! The Okta configuration is complete. Please gather the following information to provide Acante:
Client ID for the Application created
Private Key (PEM)
Okta Org Domain (see example in image below - “dev-xxxxx.okta.com” )

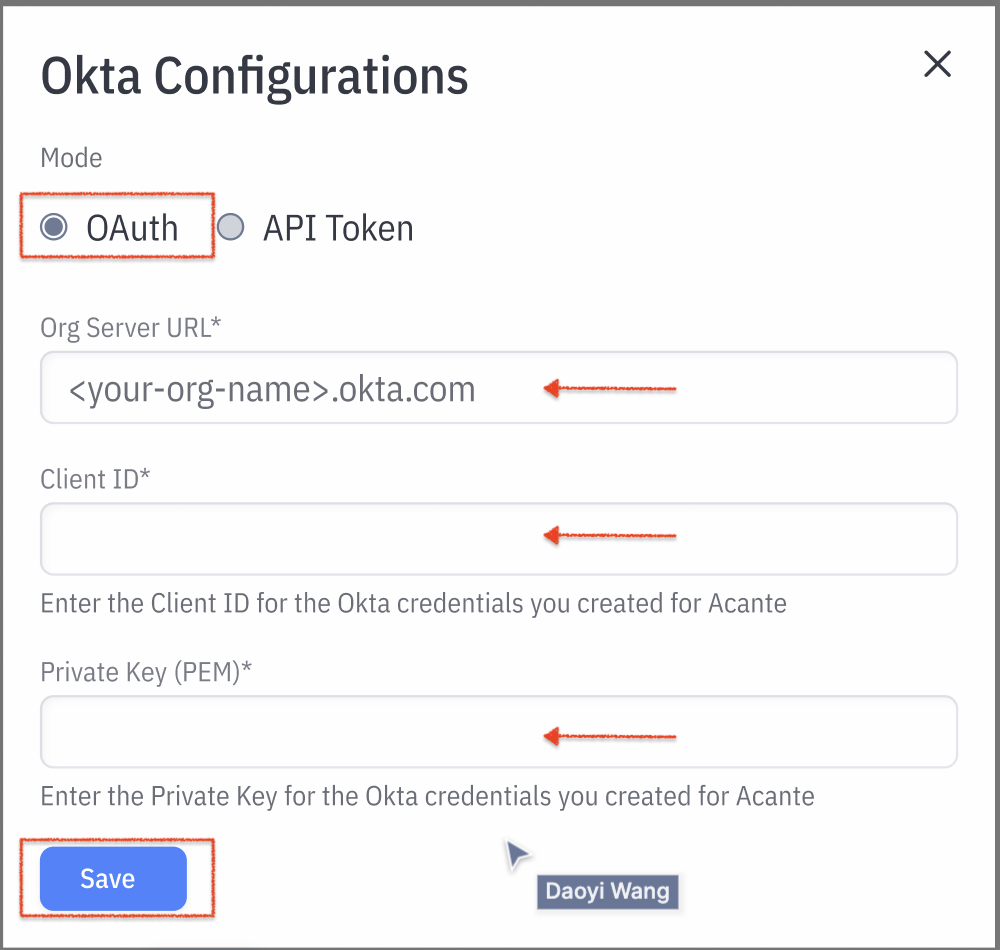
Providing the Okta Configuration in Acante UI
Navigate to the Configurations tab of the Acante UI. At the bottom, select the Okta integrations.
- Click on Config

Retain the default OAuth selection and add the information collected from the previous section. All 3 fields are Mandatory. Click Save
The integration will check the connection and if successful, it will show a “Connected” success indicator as shown below

